How To Diagnose, Rehab, and Prevent Future Back Pain
Back pain affects 8 out of 10 people at some point in their lives. Most back pain is acute or short-term and will resolve relatively quickly. An acute injury is a short term injury directly related to tissue damage, like a sprained ankle or paper cut. Acute injures almost always heal on a predictable timeline. If you have an acute back injury, it is best to take a short rest period followed by a back-friendly exercise program. The length of the rest period depends on the severity of injury: 1-2 days for minor injuries, longer for more severe.
Long term (chronic) back pain is less common, but still affects 10% of the population at any given time. A chronic injury is usually longer lasting because the pain is reoccurring. It will not go away on it’s own as there is a root cause that needs to be addressed. Rest usually helps, but the pain will almost always return because we return to engaging in a certain repetitive motion or behavior that is causing the pain. We do not need to change the behavior yet, we need to fix what is causing the behavior, then we can take a look at the behavior.
The key difference is this: Acute pain is a simple issue that almost always goes away on it’s own, while chronic pain is a more complex issue which never goes away on it’s own.
This article focuses on the more complex and frustrating type of back pain: Chronic
The back is a strong resilient joint, but the body is very protective of it because it is so crucial. This means that you will often feel reoccurring pain long before the condition becomes severe. This affect is double sided: it allows time to address the issue, but because there aren’t any immediate consequences other than pain, it can be left unaddressed. If unaddressed for long enough, an injury will occur and / or the pain continue to increase hindering workouts and affecting quality of life. At that point, it takes a lot more time and energy to address the issue and it really becomes a huge pain in the ass. It might mean missing work, not being able to do activities you enjoy – sexy time for example, and gains at the gym will come to a grinding halt. It is much much easier to just address the issue while its still minor.
Here’s an example of chronic back pain in action: Lily excessively leans forward during squats causing her back to round. When her back rounds during squats, she experiences back pain the next day. No surprises there. We know that the rounding is caused at least in part by leaning forward – which is great info. Now, why is she leaning forward? That is the magical question that if we answer, i’d bet my motherfucking bottom dollar, would cure her back pain. In this example, the answer is very often calf tightness. We can easily test this, and if her calves are tight, we can stretch, and the issue will likely drastically improve in a week or two. Once Lily’s calves are functional, we can improve her squat technique which will take the pressure off her back. As a side benefit, she will also get better results with the improved technique. Double win! The hard part is knowing what the possible underlying causes are, and what to do about them. That is the entire point of this – to help you identify and address the underlying causes of chronic back pain. The good news is that nearly all chronic back pain is linked to one or more of just 3 issues:
- GLUTE WEAKNESS
- MOBILITY RESTRICTIONS
- MUSCLE IMBALANCES
The rest of the article will break down each possible root causes of back pain pertaining to glutes, mobility, and macular imbalance. There is a test for each possible issue to determine if it’s a limiting factor for you, as well as corrections for each . Lets start with: that PHAT ass shorty! Ahem, I mean glutes.
Glute weakness
The glute max is the largest skeletal muscle. I consider the glutes the core of the lower body. One of their main roles is to stabilize the hips, thus protecting the back. When we have weak glutes, the back has no choice but to pick up the slack. Over time, we develop movement patterns that overwork the back causing pain and eventual injury. One of the most common causes of back pain related to glute weakness is an overactive piriformis muscle which, again, is picking up the slack for underactive glutes.
Sitting for long periods of time is a top contributing factor of glute weakness. Aside from that, most people do not train their glutes, and those who do, rarely train them enough or with the correct technique. The medial glute, which is responsible for hip abduction (moving the leg away from the body laterally), is a weak area for most people and generally deserves attention.
Perform the following test to discover if your glutes are weak –
Weak glute squat test:
- Stand with feet shoulder width apart
- Lower yourself into a half squat or full squat (full preferred)
- Place your hands on your hips or raise them out front
- Hold this position
- While holding, determine which muscles become sore first
- Time your hold, the longer the better
- All persons should be able to hold for at least 30 seconds, 1 minute is standard, 2 minutes is standard for those with an active lifestyle.
What are you feeling: Are your glutes activating as they should? They should be providing a considerable amount of lifting and holding power. If they are working correctly, they should become fatigued along with your quadriceps and lower back. If you find that your quads, knees, and back become sore before your glutes, you have weak and / or underactive glutes.
Correction: Add glute specific training into your workouts 1 – 3 times per week completing one hip extension exercise and one hip abduction exercise each time. Complete 2 – 3 sets of 8 – 12 reps of each exercise.
Glute Specific Hip Extension Exercises (pics below)
- Weighted hip bridge or barbell hip extension
- Sumo deadlift or banded landmine sumo deadlift (better)
- Forward leaning Bulgarian split squats with a long stance set-up
-

- Weighted Hip Bridge A
-
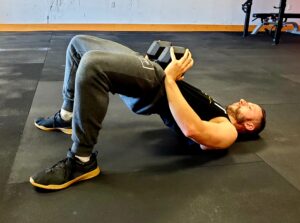
- Weighted Hip Bridge B
-
- Bar Hip Extension A
-
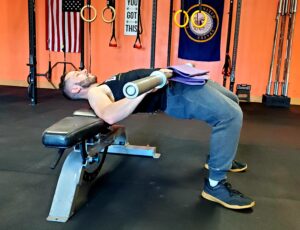
- Bar Hip Extension B
-
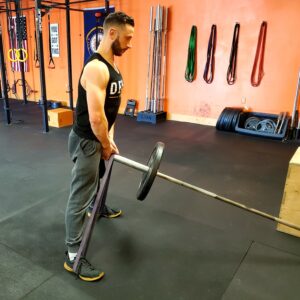
- Banded Sumo Dead A
-
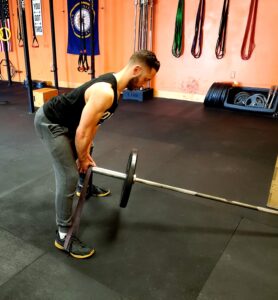
- Banded Sumo Dead B
-
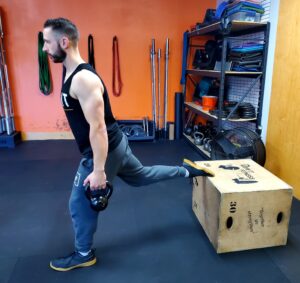
- Bulgarian Split Squat A
-
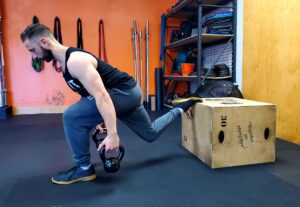
- Bulgarian Split Squat B
Hip Abduction Exercises (pics below):
- Monster walk
- Banded clamshells
- Side plank leg raise
-
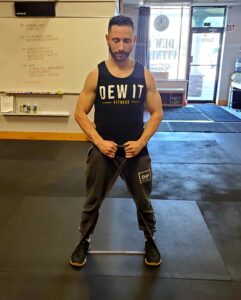
- Banded Monster A
-
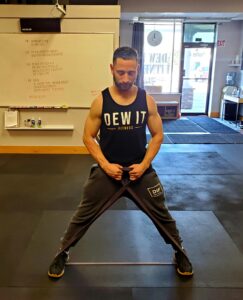
- Banded Monster B
-
- Banded Clamshell A
-
- Banded Clamshell B
-
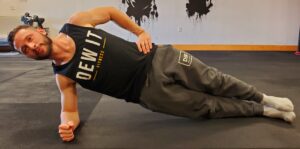
- Side Plank Leg Raise A
-
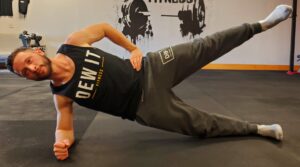
- Side Plank Leg Raise B
Mobility restrictions
Mobility is the ability of a joint to move through its natural range of motion without restriction from surrounding tissues. When a mobility restriction is present, our body must compensate elsewhere, moving unnaturally and placing abnormal stress on our joints. The main mobility restrictions associated with back pain are tight hip flexors, tight glutes, tight calves, and spinal compression. If mobility restrictions are affecting your back, tight hip flexors and glutes are almost always contributing factors.
Here is a common example of how mobility restrictions develop resulting in muscular imbalances, abnormal movement patterns, and finally, pain and injury:
Charlie always carries his groceries with his right arm. Over time, his right arm has become stronger than his left and the associated muscles have become much tighter than those on the left side. At this point, he has a small muscular imbalance and moderately restricted movement of the right shoulder.
Now, when Charlie does push-ups, he relies more heavily on the right side since it is stronger, further unbalancing the muscles and causing the strong side to become even tighter. Since his right shoulder is so tight, his scapula cannot move freely so his shoulder pulls forward and rounds slightly with each push-up. The resulting unnatural movement pattern is literally causing the top of his arm bone to grind against his shoulder socket.
At first, Charlie will experience little or no negative consequences, but over time his condition will worsen and he will notice pain, tightness, discomfort, and weakness of his neck, shoulder, and possibly back and elbow. This is happening because Charlies mobility restrictions are causing unnatural movement patterns. And those unnatural movement patterns are causing further mobility restrictions.
If left unaddressed, his rotator cuff will almost certainly tear and require surgery. Or he can stretch for a few minutes a day and make minor adjustments to his training. Up to you Charles!
Hip flexors
When we sit, we put our hip flexors in a shortened position. Spending too much time in this position leads to neural inactivity, tightness, and weakness causing spinal instability and pain. Neural inactivity means our neurons, which “fire” sending an electrical impulse which allows us to move our muscles, literally stop firing. Our pelvis also becomes rotated which traditionally causes unbalanced weight distribution across joints. The result, again is muscle imbalances (one of our top 3 causes of back pain) and poor movement patterns. NOOOOO!
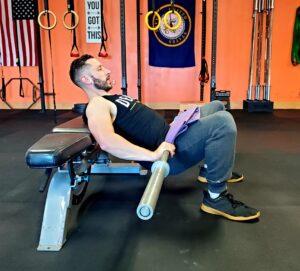
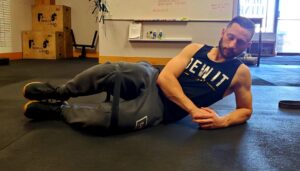
Tight hip flexor test: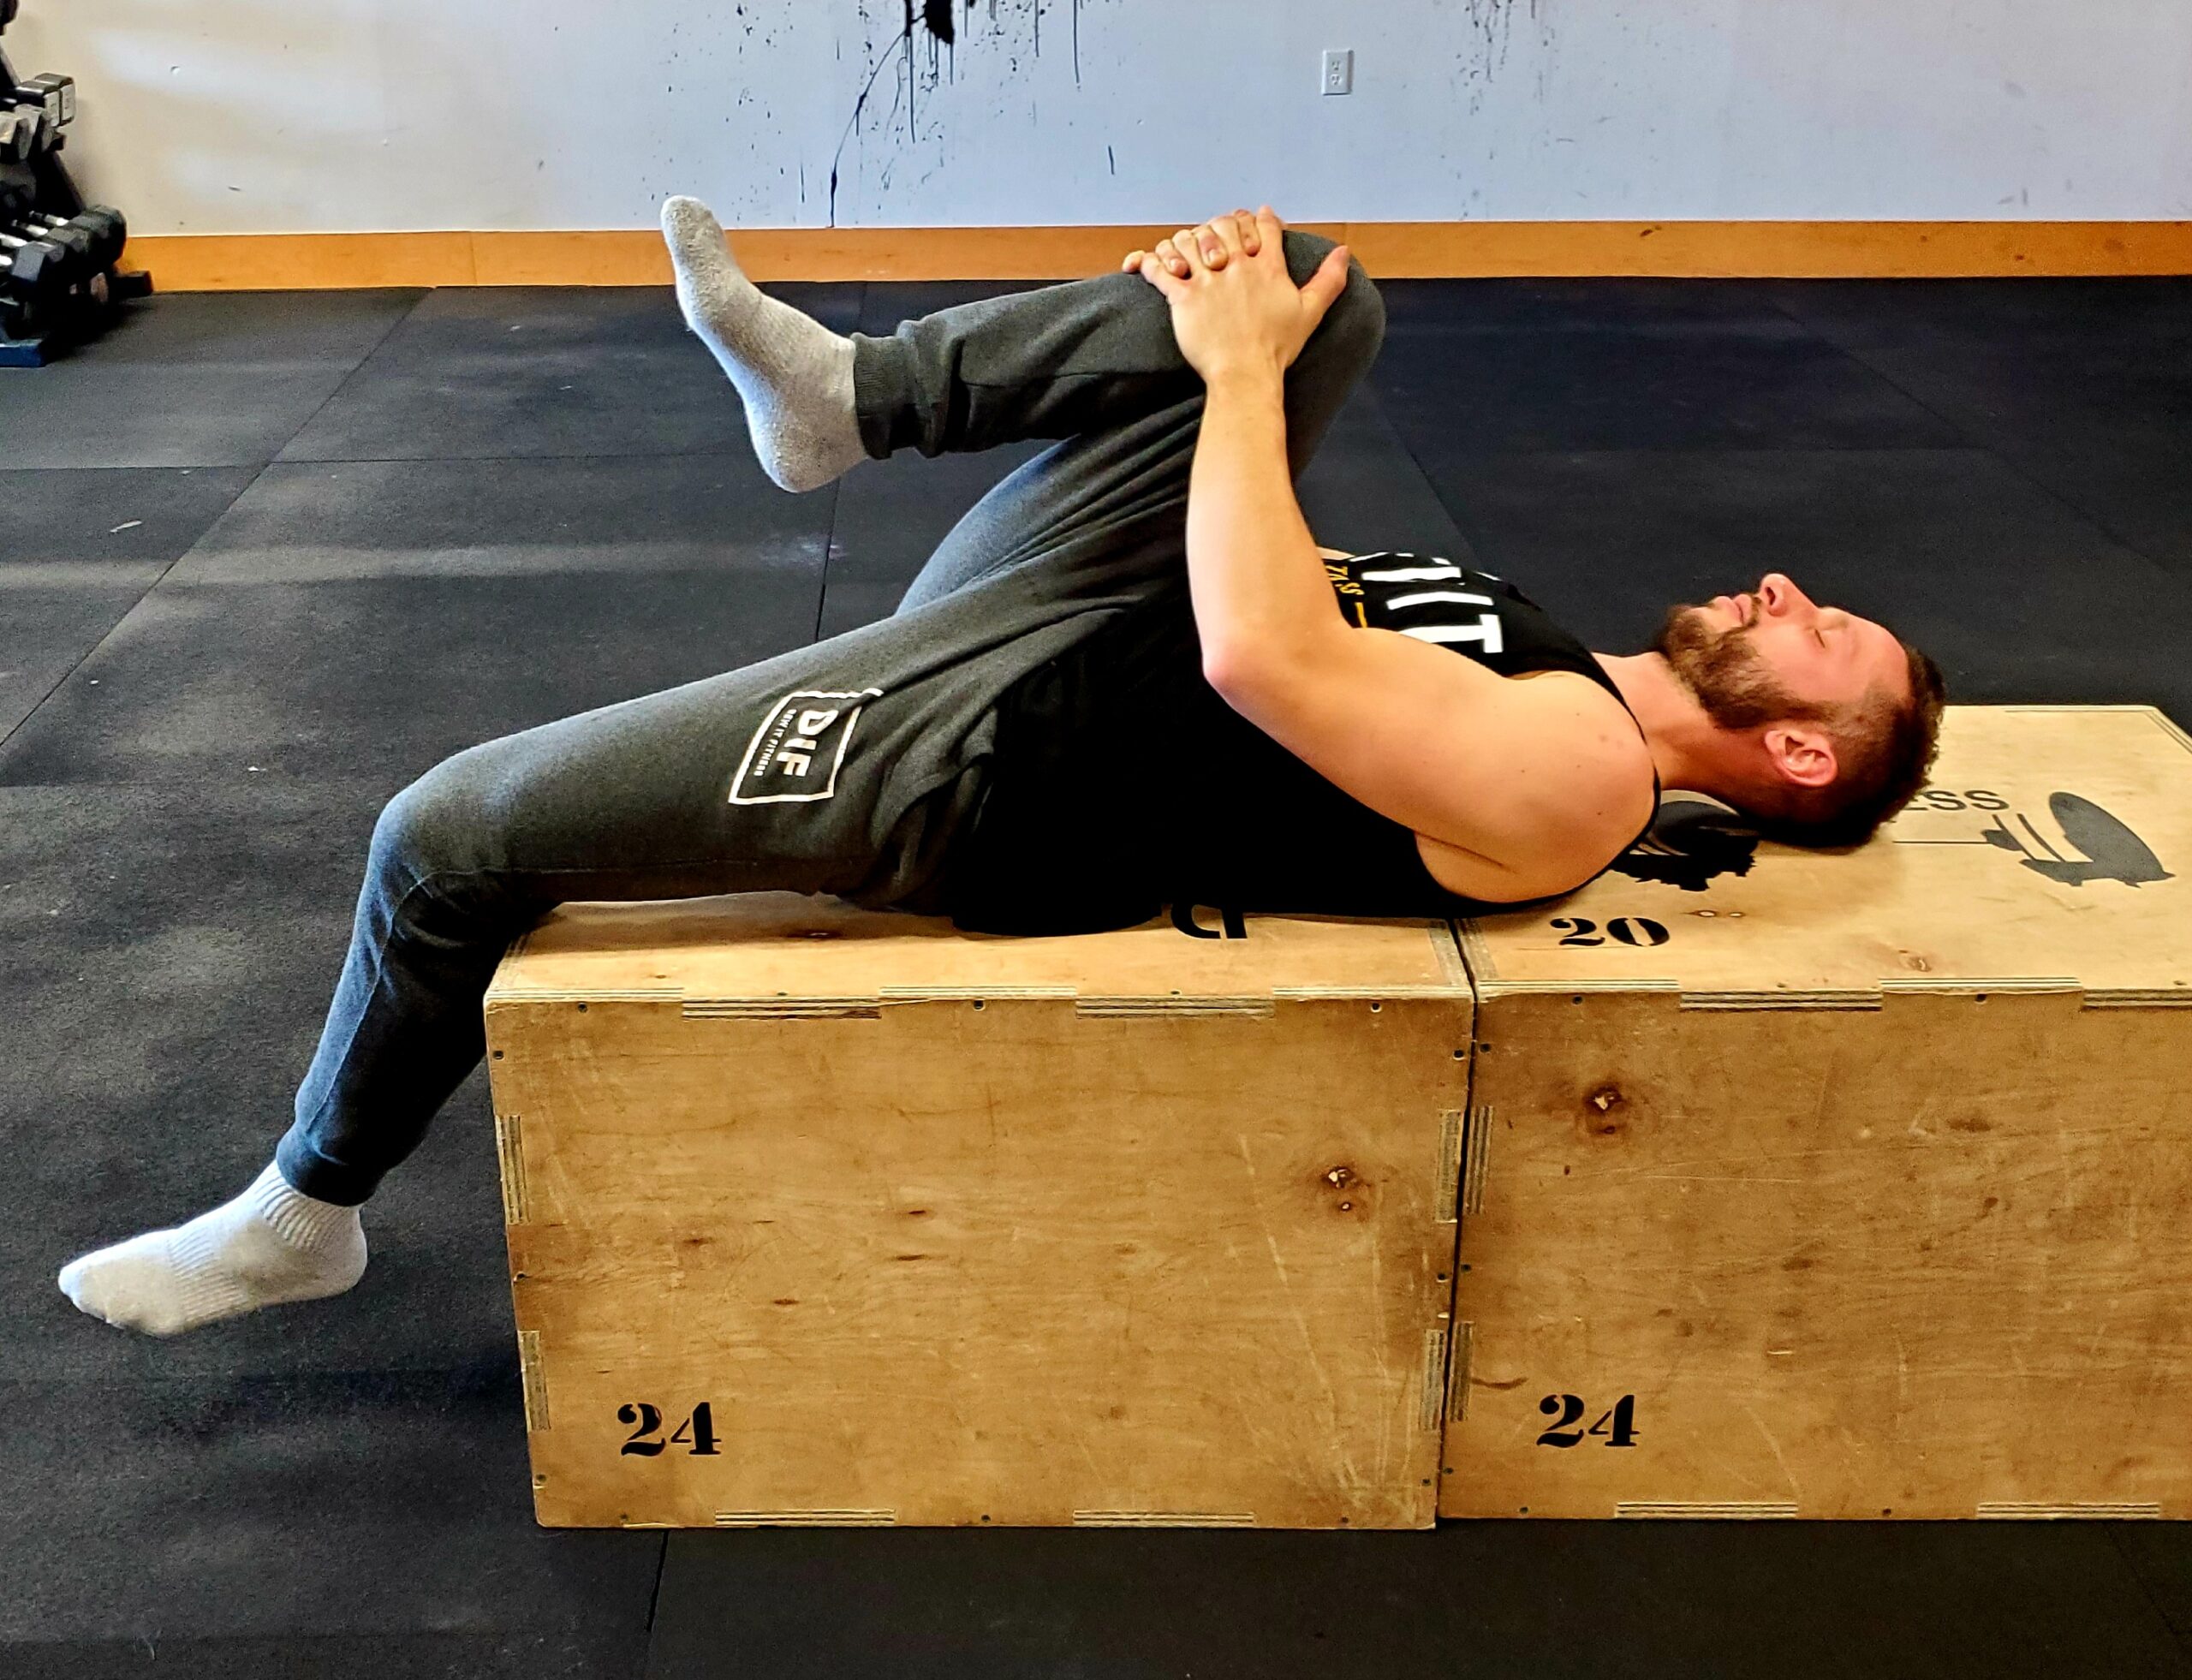
- Sit on the edge of a firm surface like a table, bed, or plyo box.
- Lie flat on your back and pull both knees to your chest.
- Hug your right knee FIRMLY to your chest as you release your left leg and lower it to the ground with about a 110 degree angle of the knee joint.
- Relax your hips and lower as far as possible.
- Repeat on the other side.
If you’re unable to lower your extended leg to the ground, your hip flexors are considered tight on that side. The above picture would be considered a failed test. You can see space between my leg and the box. In addition, my foot is also elevated above the ground. If my hip flexors weren’t as tight, my leg would be flush with the box – Flush I Tell You! and my foot would be closer to the ground or fully on it. Bad hip flexors!
Correction: For tight hip flexors, complete the half kneeling banded hip flexor stretch and/or worlds greatest stretch 2 – 5 times per week holding for at least 60 seconds in each position. Make sure to relax you hip flexor on the banded side and allow your hips to come forward slightly toward the anchor point. Push your ribcage downward.
-
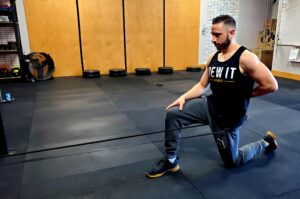
- Banded Hip Flexor
-
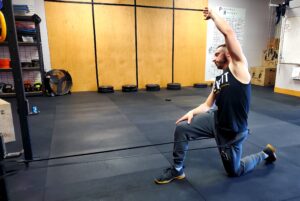
- Advanced Banded Hip Flexor
-
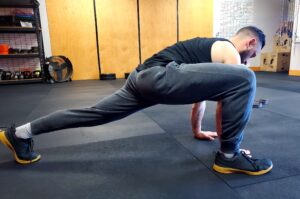
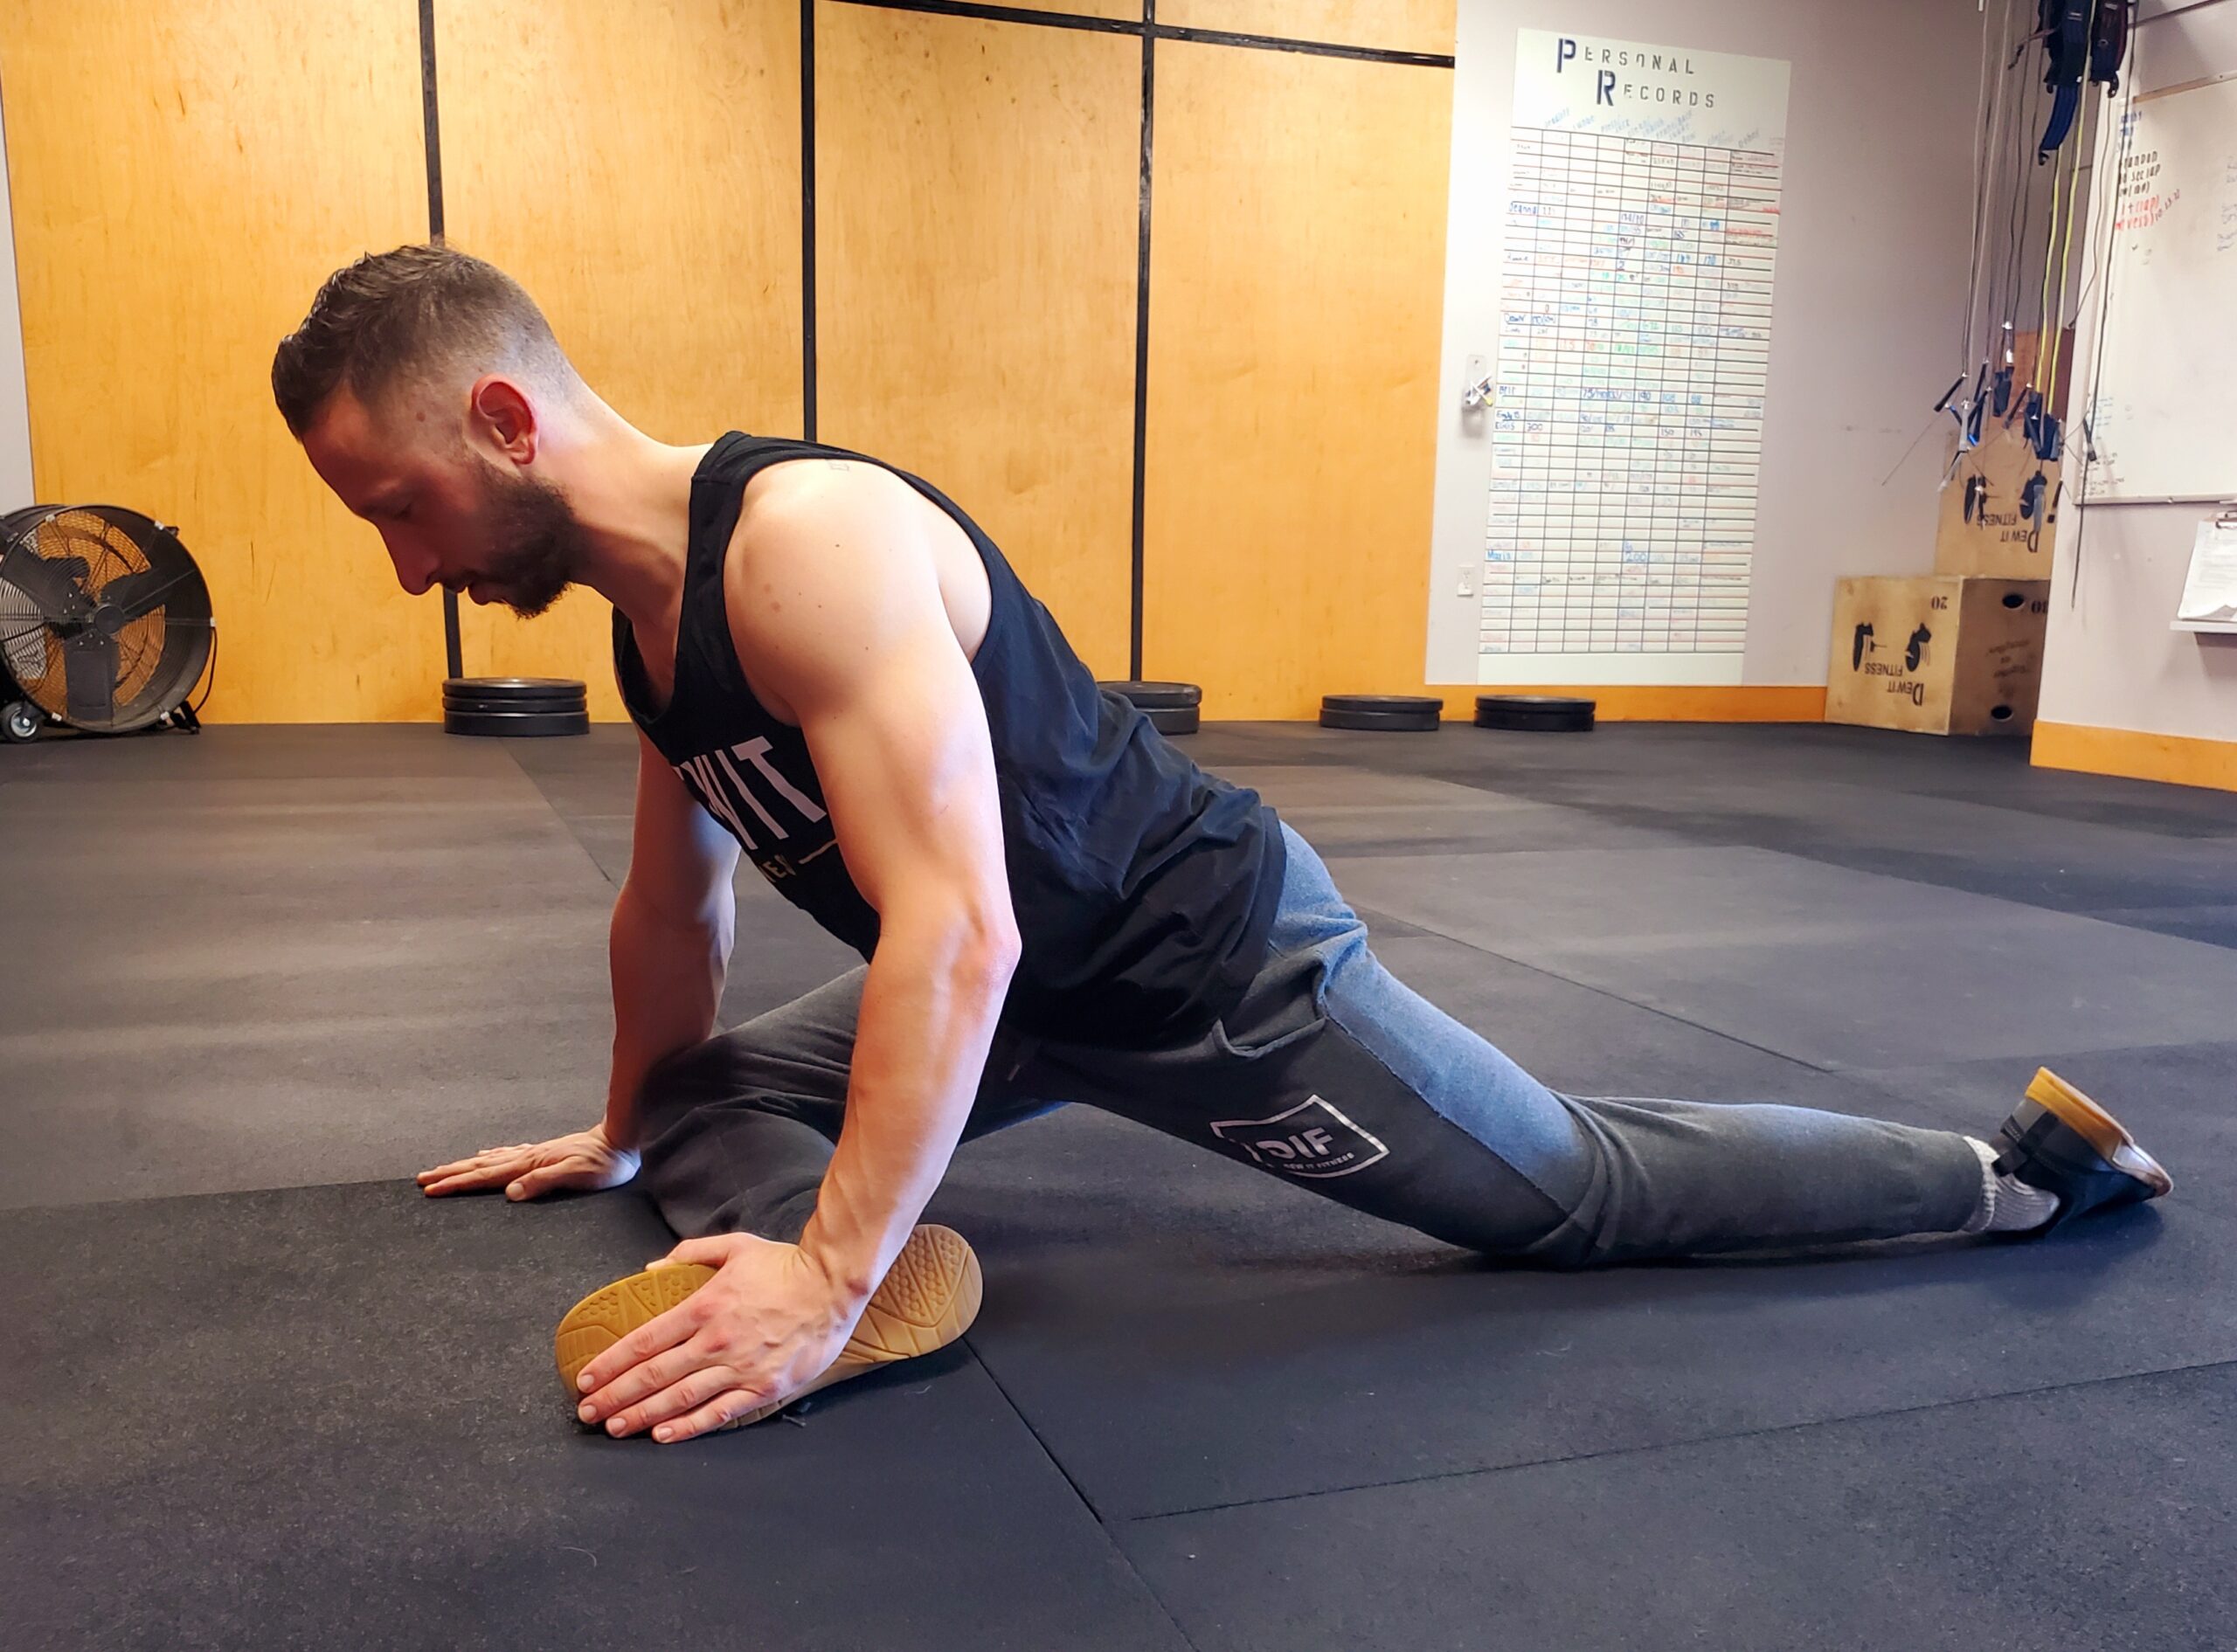
- Worlds Greatest Stretch
Calves
Overly tight calves can cause the unwanted tilting of your pelvis during exercise and everyday knee and hip movements.
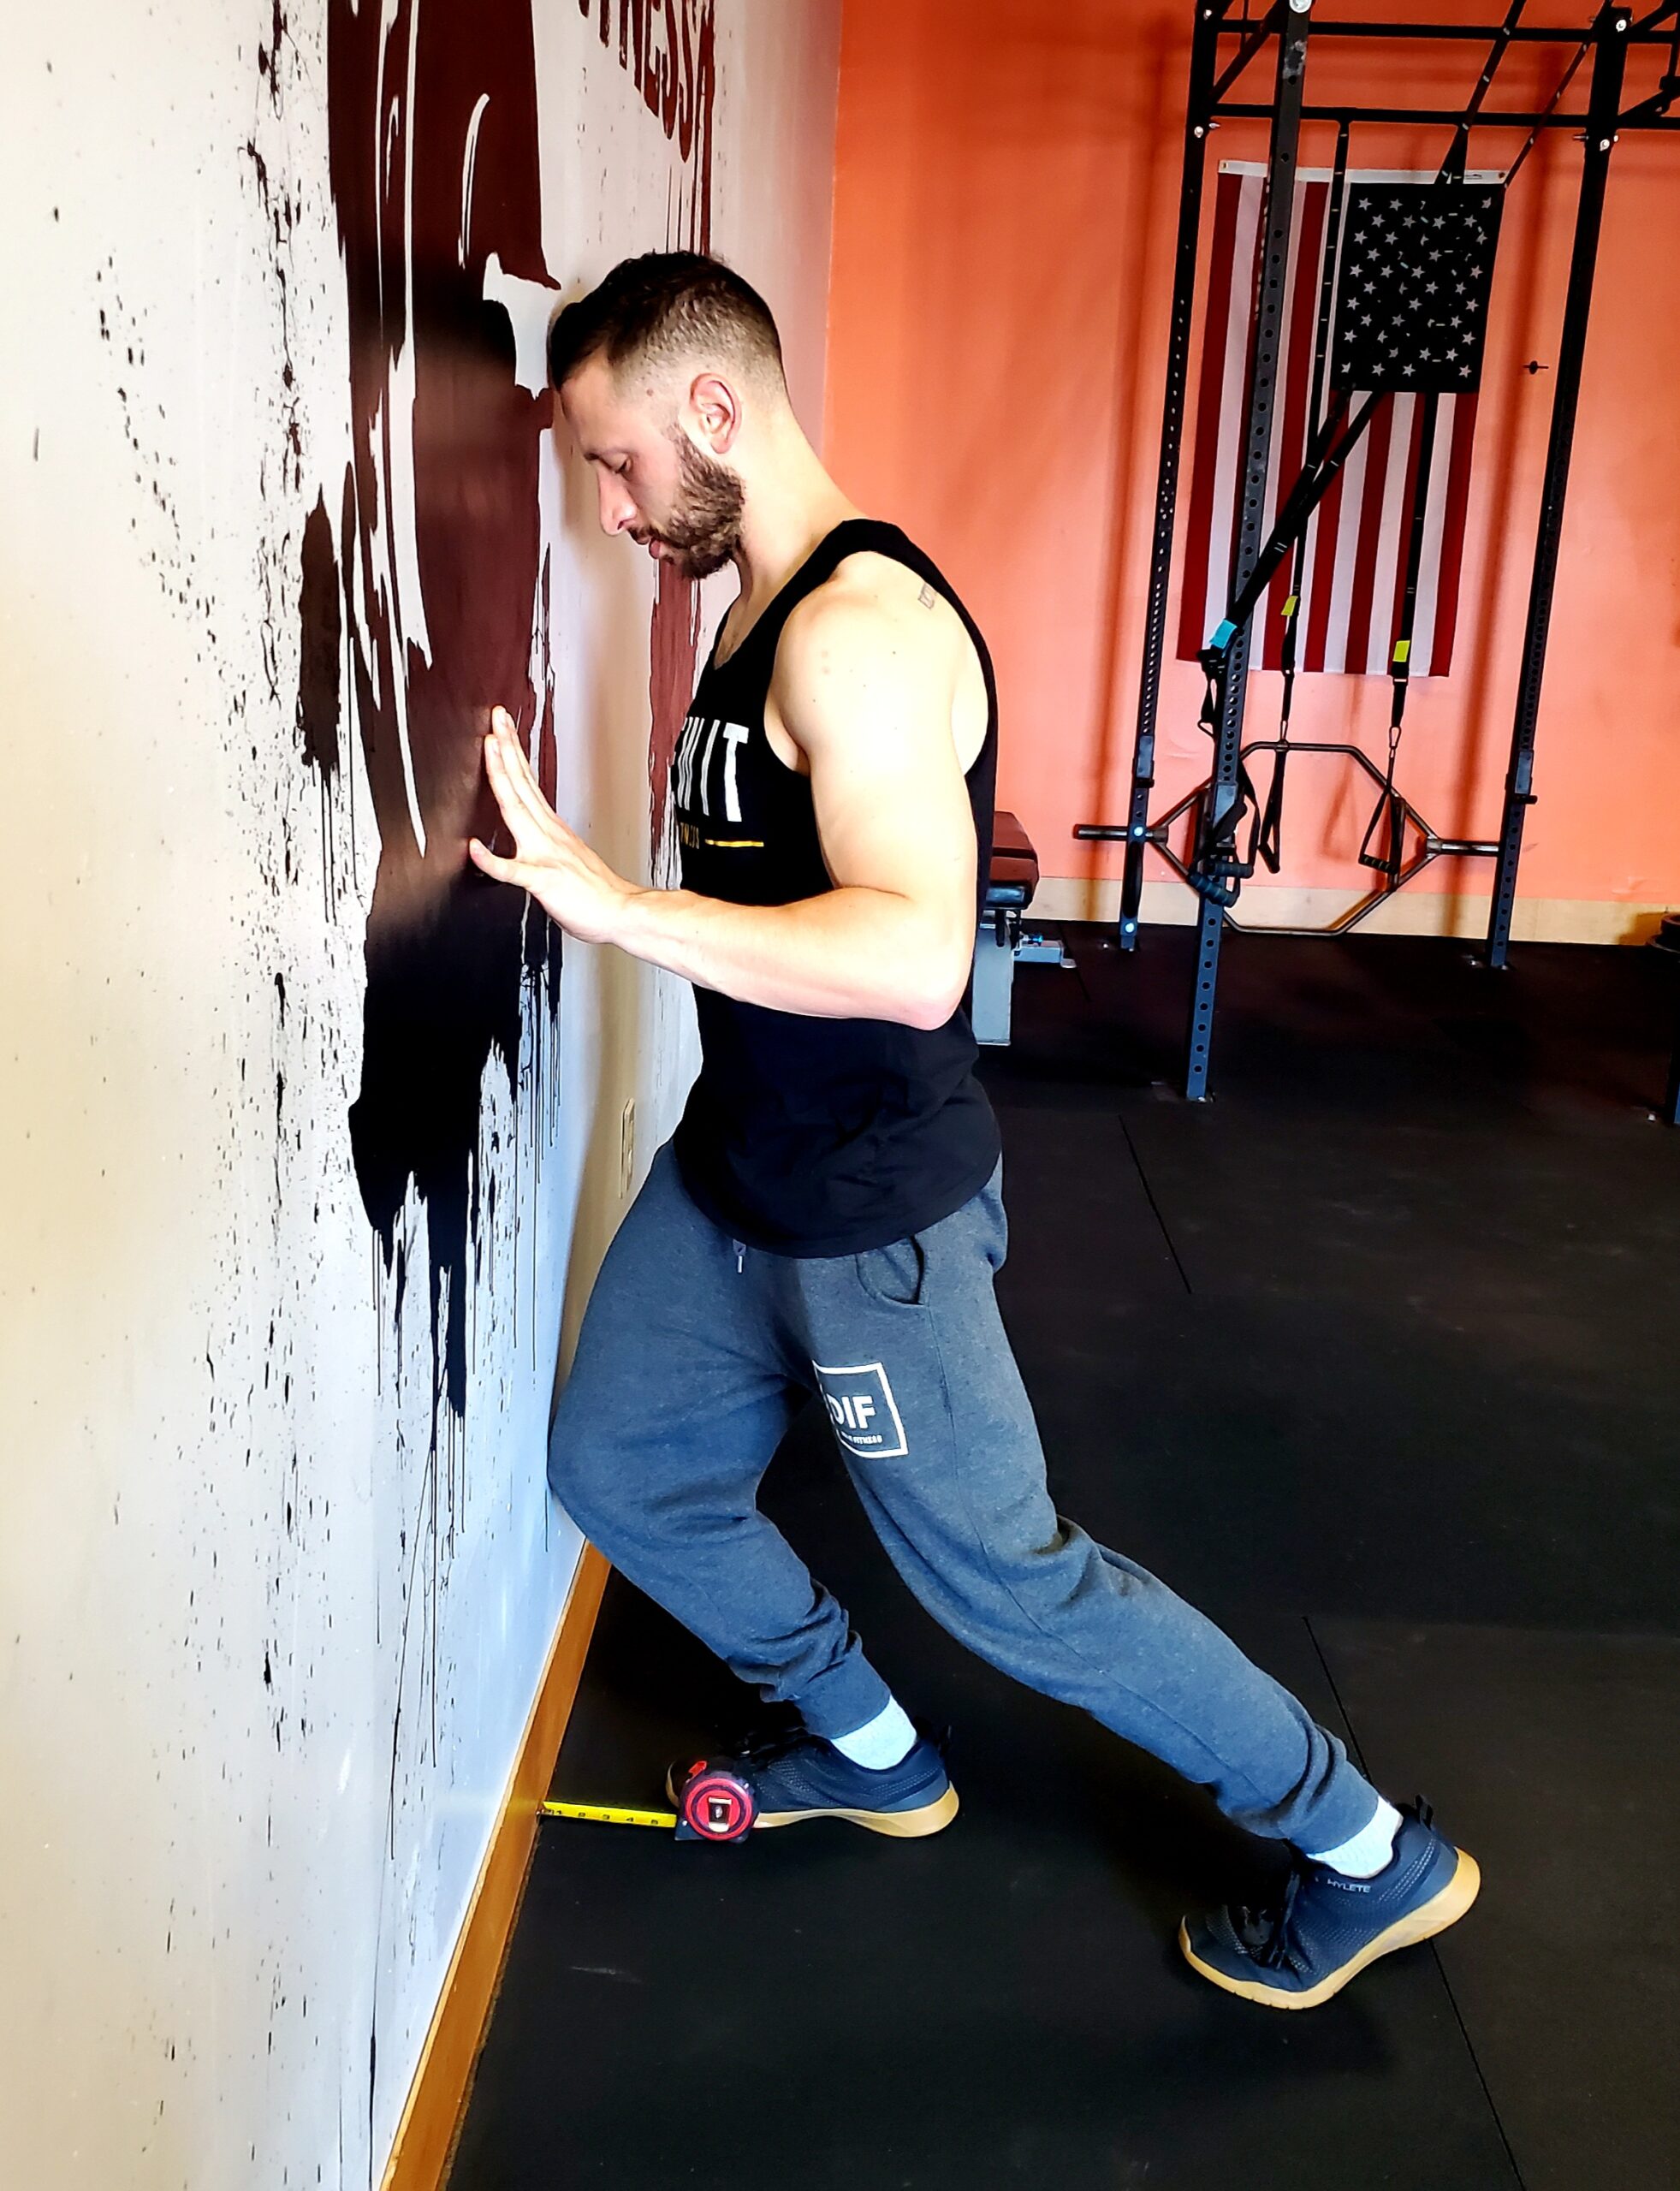
Tight Calf test:
- Stand facing a wall with the toes of your front foot 4 inches away from the wall.
- Place your rear foot one foot length behind the front foot.
- Bend your front knee until the kneecap touches the wall keeping your front heel on the ground.
- If you are unable to touch without lifting the heel, move closer and try again. Record your maximum distance for both sides.
Anything less than 4 inches is considered tight.
Correction: For tight calves, stretch your calf both with your knee extended and with your knee bent. Complete 2 – 5 times per week holding for at least 60 seconds in each position.
Glutes
Tight glutes have basically the same effect as weak glutes. They cause overworking of the back, spinal and pelvic instability, and poor movement patterns (more specifically, the breakdown or prevention of proper movement patterns).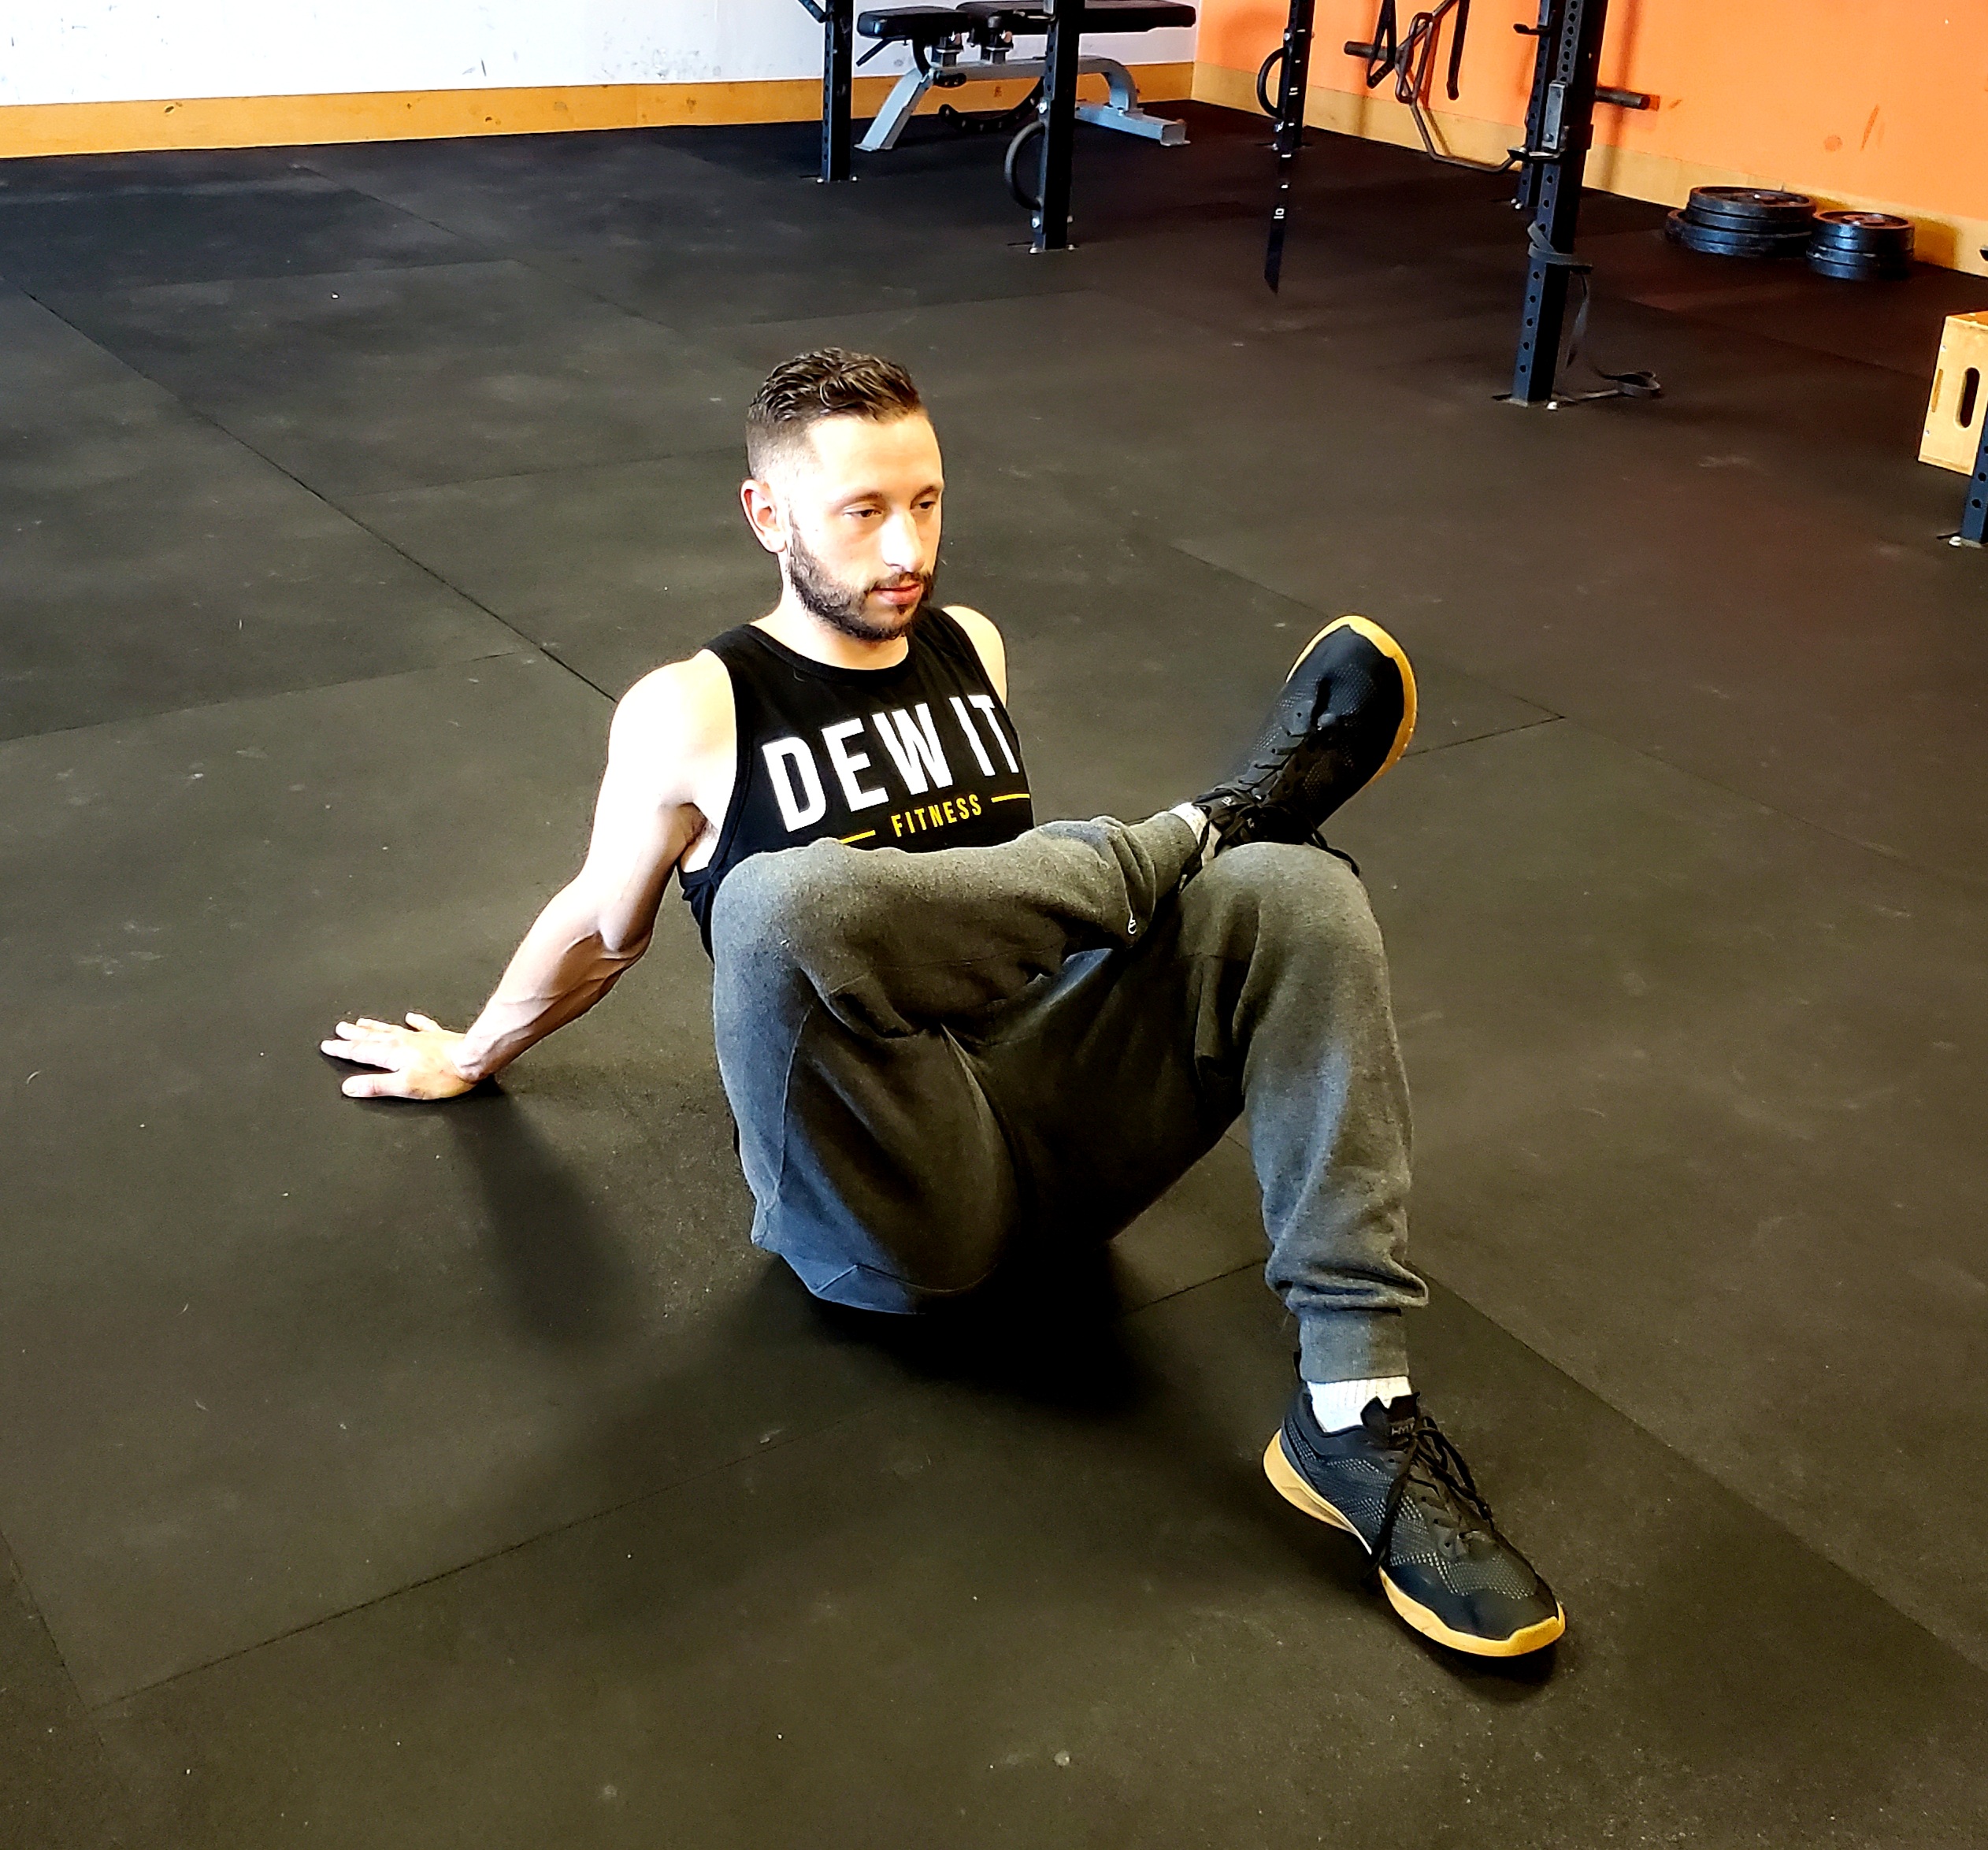
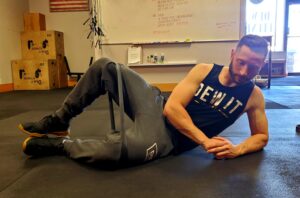
Tight glute test:
- Sit on the floor with your legs in front of you.
- Fold one leg over the other resting the ankle of the folded leg just above the knee of the straight leg.
- Bend the straight leg pulling the knee toward you until your foot is resting flat on the floor. Your glute may already feel tight.
- Place your hands flat on the floor behind your back and gently push your chest up and toward your knees if you are able.
- Hold this position for 10 – 20 seconds and repeat on the other side.
How does the final position feel? It should feel relatively comfortable with a mild to moderate stretch toward the outside of your hip and gluteal region. If it does not or you are unable to get into position, your glutes are considered tight.
Correction: For tight glutes, complete the pigeon stretch on the floor and with your forward leg elevated. Complete 2 – 5 times per week holding for at least 40 seconds in each position.
Piriformis
The Piriformis muscle is a flat band-like muscle in the upper glute region of the hips. It is important to mention because it can be a common cause of back pain when the glutes are weak or underactive, causing the piriformis to overwork. When overworked, the piriformis can be strained or become chronically tight leading to improper movement patterns and back pain.
Tight piriformis test:
- Sit upright in a chair and place the ankle of one leg on the knee of the other.
- Place one hand on the ankle of the top leg for stability. Place the other hand under the outside edge of the top knee.
- Lean forward as you pull your knee up towards your chest.
-
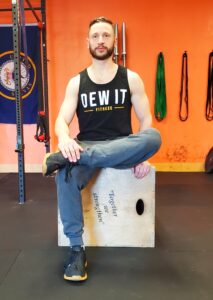
- Piriformis Test A
-
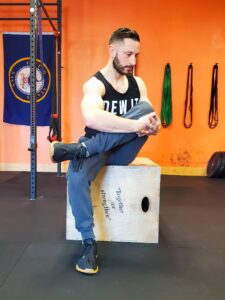
- Piriformis Test B
If pain is felt in the glute / piriformis region (deep glutes), the test is positive for a tight piriformis. If pain is felt in the posterior section of the thigh, the piriformis muscle may be pinching the sciatic nerve. In either case, stretching your piriformis should help.
Correction: For a tight piriformis, complete the piriformis stretch 2 – 5 times per week holing for 30 – 60 seconds at a time.
Piriformis stretch:
- Lie on your back and pull one foot in placing your foot close to the back of your other knee.
- Tuck your toes behind that knee and roll to the side of your straightened leg.
- You should be resting on your glute. Do not role so far that you are resting on your hip.
- Pull your bent knee toward the floor and slightly toward your chest with the opposite arm (right arm to left knee or vice versa).
- Raise the other arm in the air.
- Repeat on the other side.

Spinal Compression
Spinal compression happens to everyone as a result of everyday life and as a function of gravity. It can lead to pain, stiffness, burning, tingling, sciatica, cramping, numbing, and muscle weakness. Short of an x-ray, spinal compression is a difficult thing to test for. The best method is to simply test how helpful spinal decompression is by stretching your back a few times per week for a few weeks. If it is helpful, make it a regular practice! We should all be doing some amount of spinal decompression regularly anywho.
Correction: Effective techniques for spinal compression include inversion tables, the reverse hyper exercise, and bar hangs. Bar hangs are the simplest and most accessible technique.
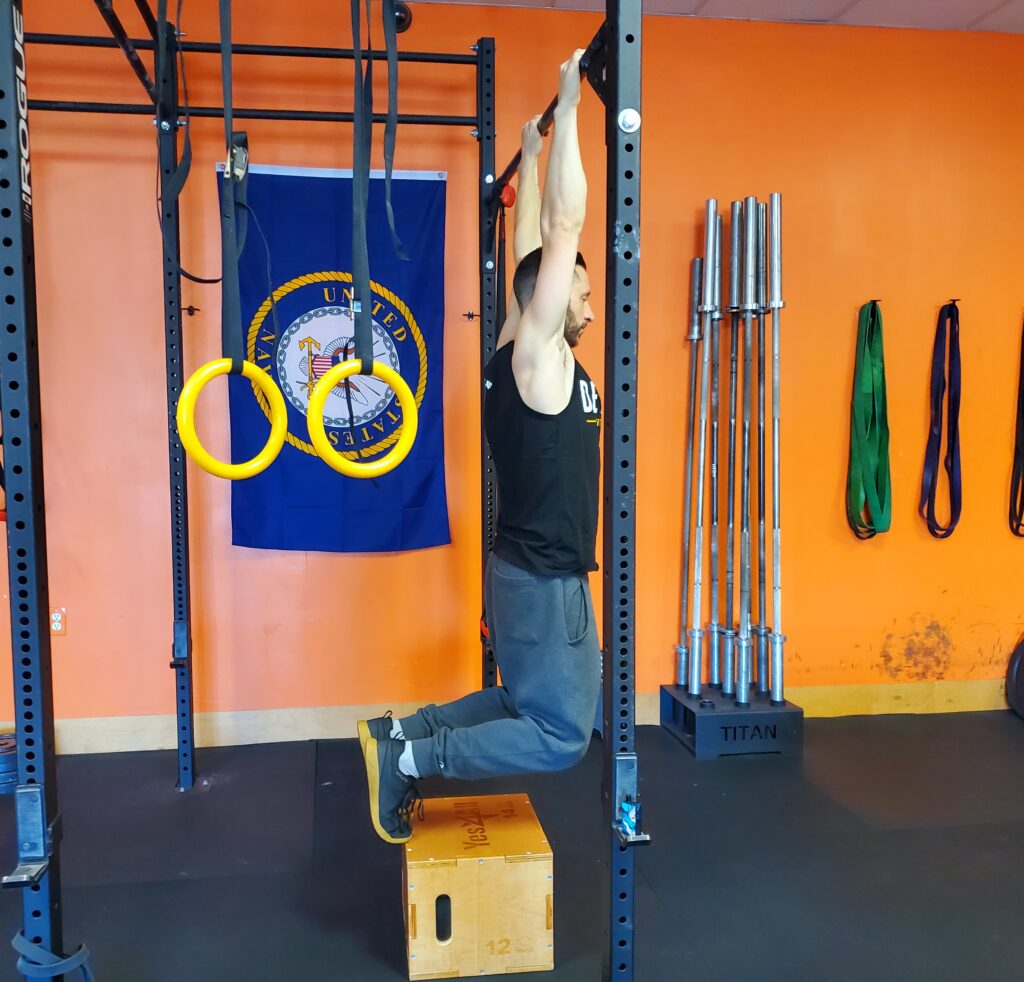
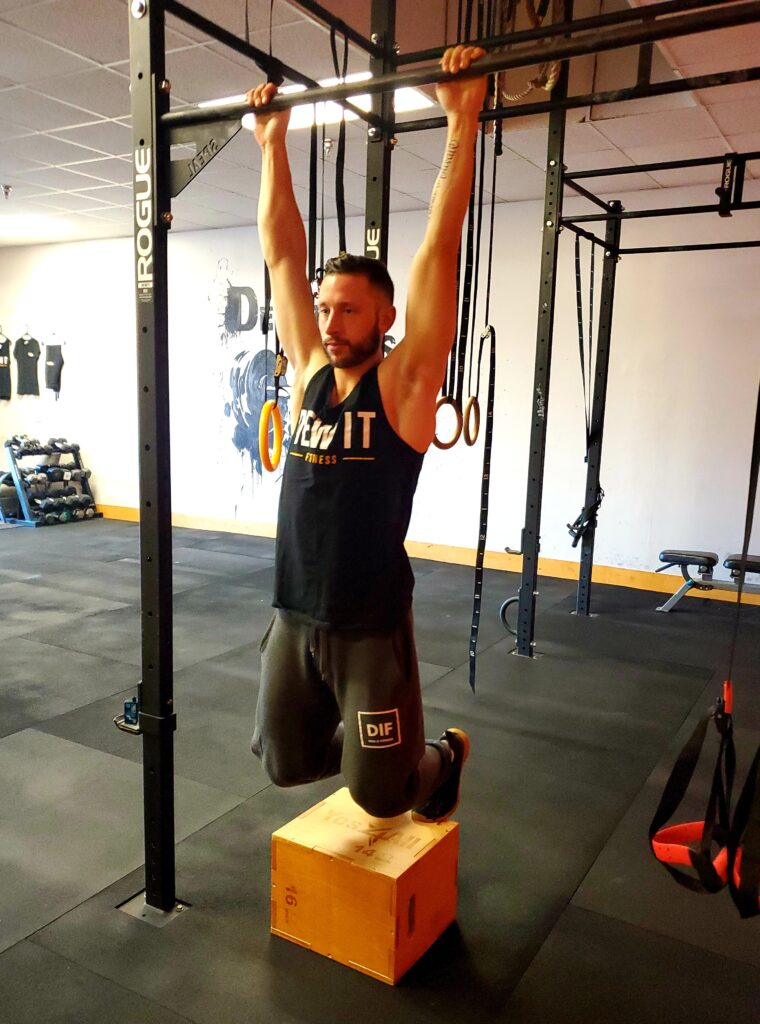
When using bar hangs for spinal decompression, the set-up should allow you to hold the bar while resting your toes on the ground (or on a plyo-box, bench, or other solid surface). In other words, if you reach up and grab the bar, you should need to bend your knees to hang. This allows passive support from the lower body which helps to loosen the back allowing decompression.
Once you have the proper set-up, grab the bar with an overhand or neutral grip and step back until your arms are straight, then bend at the knees and allow your heels to raise as your body shifts forward. Keep your toes and the balls of your feet on the ground supporting a small amount of your weight. Gently pull your shoulders down. Relax your back and hips and try to envision and feel your lower back elongate as your vertebrae separate. Sometimes it helps to slowly wiggle your hips side to side. Complete 2 – 7 times per week accumulating 2 – 3 minutes each time. The duration of each individual hang is not important, it’s the accumulation of time that matters.